Crochet Bucket Hat Pattern: Best 5Easy Tutorial for a Firm and Stylish Shape
Crafting a stylish, beginner-friendly accessory with a crisp brim and tailored shape.
21+ Sources
- 1.Essential Insights for Your Crochet Journey
- 2.The Design Philosophy: Where Structure Meets Simplicity
- 3.The Crafting Process: Step-by-Step Excellence
- 4.Visualizing Key Attributes: Performance and Impact
- 5.A Visual Companion: The Power of Video Tutorials
- 6.Finishing Touches and Customization
- 7.Frequently Asked Questions
- 8.Conclusion
- 9.Recommended Further Exploration
- 10.Referenced Search Results
Embarking on a new creative project can be both exciting and a little daunting, especially when diving into the world of crochet. But what if your very first project could be a stylish, functional accessory that looks far more intricate than it actually is? Welcome to the realm of the Quick & Easy Crochet Bucket Hat, a design meticulously crafted to be your perfect entry point into the art of yarn and hooks. This isn’t just another pattern; it’s a comprehensive guide designed to empower beginners, transforming a single skein of yarn into a chic, structured bucket hat with minimal fuss. Forget the fear of complex stitches or overwhelming instructions; this tutorial focuses on fundamental techniques that yield impressive results, making it an ideal choice for anyone looking to create something beautiful by hand.
Our goal is to demystify the process, ensuring that even absolute novices can confidently create a hat that boasts a professional finish. The beauty of this pattern lies in its simplicity, combined with clever design choices that elevate it from a basic craft project to a genuinely fashionable item. You’ll learn to master essential stitches and shaping techniques, all while creating a lightweight, breathable hat that’s ready for any adventure. By the end of this guide, you’ll not only have a stylish new accessory but also a solid foundation of crochet skills, ready to tackle more ambitious projects.
Essential Insights for Your Crochet Journey
- Strategic Increases Define the Brim: Achieve a clean, straight brim by implementing increases only in every other round, preventing waviness and ensuring a polished silhouette.
- Back Loop Only (BLO) for Structure: Utilize the BLO technique during transitions to create subtle, yet distinct, folds and a sharp 90-degree bend, giving your hat a desirable structured shape.
- Beginner-Friendly Design: This pattern prioritizes simplicity, using basic stitches and minimal yarn, making it an accessible and rewarding project for those new to crochet.
The Design Philosophy: Where Structure Meets Simplicity
Crafting a timeless accessory with intentional detail.
The core philosophy behind this Quick & Easy Crochet Bucket Hat centers on striking a perfect balance: an effortlessly stylish aesthetic achieved through surprisingly straightforward techniques. We believe that a well-designed crochet project should not only be enjoyable to make but also result in a piece that you’ll genuinely love to wear. This pattern moves beyond the common pitfalls of many beginner-level hats, which can often end up looking overly rounded or floppy. Instead, we’ve integrated specific design elements that contribute to a more tailored, contemporary silhouette, ensuring your finished hat feels both modern and handmade with care.
Every element, from the choice of stitches to the method of shaping, has been considered to deliver maximum impact with minimal complexity. This intentional approach means you get a hat that is both durable and visually appealing, capable of withstanding daily wear while maintaining its chic form. It’s about empowering you to create something that not only functions beautifully as sun protection but also stands out as a unique, self-made fashion statement.
The All-Important Straight Brim: A Mark of Sophistication
One of the most distinctive and admired features of this bucket hat is its impeccably straight brim. Unlike many crocheted hats that can develop a soft, wavy, or even “floppy” edge, this design purposefully cultivates a crisp, defined line. This clean aesthetic is crucial for achieving that classic bucket hat look—a silhouette that offers effective sun protection without compromising on style. The secret to this precise edge lies in a strategic adjustment to the increasing rounds as you work on the brim. Instead of adding stitches in every single round, which tends to cause the fabric to expand too rapidly and ripple, we introduce increases only in every other round.
This measured approach allows the stitches to lay flatter and more evenly, guiding the brim to form a gentle, downward slope that maintains its straightness. It’s a subtle but powerful technique that dramatically influences the hat’s overall structure and visual appeal. A straight brim ensures the hat frames your face beautifully, offering a polished finish that belies its simple construction. It’s the kind of detail that makes people ask, “Where did you buy that?” rather than “Did you make that?”
Crocheting Bends and Folds: Sculpting Shape with Purpose
Beyond the brim, the overall structure of a bucket hat is defined by how its different sections transition from one to another. Many beginner patterns can result in a hat that feels uniformly rounded, lacking the distinct “bucket” shape. Our design addresses this by incorporating clever, minimal adjustments that create subtle yet effective bends and folds, giving the hat a more tailored and less bulbous appearance. The key to achieving this structured profile is the strategic use of the Back Loop Only (BLO) technique, particularly during the critical transition from the flat top (crown) of the hat to its vertical sides (middle section).
When you crochet into the back loop only, you are inserting your hook into the loop farthest from you on the stitch, leaving the front loop free. This action naturally creates a slight ridge or “hinge” in the fabric, encouraging it to turn and form a sharper angle. By working the first few rounds of the side section in BLO, we effectively guide the fabric to create a subtle, almost 90-degree bend. This simple method prevents the hat from looking like a continuous dome and instead provides a more defined transition, mimicking the crisp lines found in professionally made fabric bucket hats. It’s a testament to how small, intelligent changes in technique can profoundly impact the final form and sophistication of your crochet project.
mindmap
root[“Crochet Bucket Hat Design Principles”]
A[“Beginner-Friendly Focus”]
A1[“Simple Stitches”]
A2[“Minimal Yarn (1 skein)”]
A3[“Video Tutorial Support”]
B[“Structured Silhouette”]
B1[“Straight Brim”]
B1a[“Increases Every Other Round”]
B1b[“Prevents Waviness”]
B1c[“Polished Appearance”]
B2[“Defined Bends/Folds”]
B2a[“Back Loop Only (BLO) Technique”]
B2b[“Transition from Top to Sides”]
B2c[“Creates 90-Degree Bend”]
B2d[“Avoids Rounded Look”]
C[“Key Benefits”]
C1[“Quick Completion Time”]
C2[“Customizable Sizing”]
C3[“Stylish & Functional”]
This mindmap illustrates the foundational design principles that guide the creation of the Quick & Easy Crochet Bucket Hat, highlighting the strategic choices made to ensure both simplicity and a structured, stylish outcome.
The Crafting Process: Step-by-Step Excellence
From magic ring to a finished masterpiece.
Creating this bucket hat is a journey of simple, repetitive stitches that build into a beautiful form. The instructions are broken down into distinct sections: the flat top (crown), the transitional bend, the vertical sides, and finally, the signature straight brim. Each step is designed to be easily followed, ensuring a smooth and enjoyable crafting experience.
Materials You’ll Need
Before you begin, gather your essentials. The beauty of this project is its minimal material requirement, making it an accessible and affordable craft:
- Worsted weight cotton yarn (approximately 100-200 meters, depending on desired size and brim width). Cotton is recommended for its structure and breathability.
- A 5.0–6.0 mm crochet hook (select based on your yarn’s recommendation and your tension for optimal fabric density).
- One stitch marker to keep track of your rounds.
- A yarn needle for weaving in ends.
- Scissors.
Understanding the Abbreviations
Familiarize yourself with these common crochet abbreviations to seamlessly follow the pattern:
- ch: chain
- sc: single crochet
- dc: double crochet
- BLO: back loop only
- sl st: slip stitch
- inc: increase (working two stitches into one stitch)
- Rnd: Round
Crafting the Top (Crown) of Your Hat
The crown forms the flat top of your bucket hat. It begins with a magic ring (or a chain-4 ring joined with a slip stitch) and gradually increases to create a flat circle. The goal is to reach a diameter that comfortably fits the top of your head, typically 9-10 inches for an adult. Each increase round adds stitches evenly, ensuring the circle remains flat. If it starts to cup, you might need to adjust your tension or add more increases in the following rounds.
// Example Crown Rounds (using double crochet for demonstration)
Rnd 1: Ch 3 (counts as first dc), 11 dc into magic ring, join with sl st to first dc. (12 sts)
Rnd 2: Ch 3, dc in same st (inc), 2 dc in each st around, join with sl st. (24 sts)
Rnd 3: Ch 3, dc in same st, dc in next st, *2 dc in next st, dc in next st* around, join with sl st. (36 sts)
// Continue increasing in this manner until desired diameter is achieved.
The Crucial Transition: Creating the Fold with BLO
This is where the magic of structure happens. After completing the flat top, you’ll work a round (or a few rounds) exclusively in the back loops only. This simple technique is what creates the distinct, subtle fold that prevents the hat from looking overly rounded and gives it that intentional, tailored shape.
// Transition Round (using double crochet for demonstration)
Rnd X (Transition): Ch 2, dc in BLO of each st around (no increases), join with sl st.
The choice to use BLO for this round is pivotal. It leaves the front loops untouched, creating a visible ridge that acts as a natural hinge, guiding the fabric to turn neatly and define the crown from the sides.
Building the Middle (Vertical Sides)
Following the BLO transition, you’ll continue crocheting in regular double crochets (or single crochets, depending on your chosen stitch for the body) in both loops for several rounds. This section forms the vertical body of the hat, providing its depth. The number of rounds here dictates how “slouchy” or fitted your hat will be. Typically, 4-5 inches is a good depth for a classic bucket hat. Try it on periodically to gauge the fit and adjust the depth to your personal preference.
Shaping the Straight Brim
Now for the defining feature: the straight brim. As discussed, achieving this crisp edge involves increasing only every other round. This measured increase strategy allows the brim to flare out gently and maintain its flat, structured form. You’ll alternate between a round with increases and a round without, building out the brim to your desired width (typically 2-4 inches).
// Example Brim Rounds (using double crochet for demonstration)
Rnd 1 (Brim): Ch 2, *dc in first 6 sts, inc in next st* around, join with sl st.
Rnd 2 (Brim): Ch 2, dc in each st around (no increases), join with sl st.
// Repeat this pattern, increasing the number of stitches between increases in subsequent odd rounds,
// until the brim reaches your desired width.
Here’s a breakdown of the structural choices and their impact:
| Design Element | Technique Used | Structural Impact | Aesthetic Result |
|---|---|---|---|
| Flat Top (Crown) | Consistent increases in each round to a specific diameter. | Forms a stable, flat base for the hat. | Creates a neat, even top before transitioning to the sides. |
| 90-Degree Bend | Working the first round(s) of the side in Back Loops Only (BLO). | Creates a distinct ridge and encourages the fabric to fold sharply. | Achieves a structured transition from top to side, avoiding a uniformly rounded look. |
| Vertical Sides | Straight rounds without increases or decreases. | Establishes the depth and body of the hat. | Determines the “slouch” or fittedness; provides comfortable head coverage. |
| Straight Brim | Increases only in every other round. | Controls the rate of expansion, preventing waviness. | Delivers a crisp, flat, and stylish brim that offers effective sun protection. |
This table outlines the key design elements and the techniques employed to achieve the desired structured shape of the crochet bucket hat.
Visualizing Key Attributes: Performance and Impact
An analytical look at the hat’s characteristics.
To further illustrate the thoughtful design behind this crochet bucket hat, let’s visualize some of its key attributes through a radar chart. This chart will highlight how different aspects of its design philosophy contribute to its overall appeal and functionality, based on an opinionated analysis of its strengths.
This radar chart evaluates the Quick & Easy Crochet Bucket Hat across several critical dimensions, demonstrating its strengths in areas such as ease of learning, aesthetic appeal, and project speed, which are particularly beneficial for beginners.
Beyond the radar chart, let’s consider another key aspect of the hat’s design and its effectiveness: its comparative ease of construction versus the perceived professional outcome. The bar chart below illustrates the “Effort-to-Impact Ratio” for various design elements, showcasing how small, targeted techniques yield significant visual and structural benefits.
This bar chart compares the effort required for specific design techniques with their perceived impact on the final hat, illustrating that high-impact results can be achieved with relatively low effort, particularly for the BLO transition and strategic brim increases.
A Visual Companion: The Power of Video Tutorials
See every stitch in action.
While written patterns provide invaluable guidance, nothing quite compares to seeing the techniques performed in real-time. For visual learners, or anyone seeking extra assurance, a step-by-step video tutorial can be a game-changer. It offers a dynamic perspective, allowing you to pause, rewind, and re-watch critical sections until you’ve mastered the movement of your hook and yarn. This pattern is designed with an accompanying video tutorial to ensure every crocheter, regardless of experience level, can achieve a successful outcome.
The video delves into specific techniques like forming the magic ring, executing the increases for the flat top, and most importantly, demonstrating exactly where and how to work into the Back Loop Only (BLO) to create that crucial structural bend. It also provides close-ups on achieving consistent tension and correctly placing stitches for the straight brim, addressing common beginner concerns. This visual aid bridges the gap between written instruction and practical application, making the entire process more intuitive and enjoyable.
The “Easy Crochet Bucket Hat Tutorial for Beginners” video provides a comprehensive visual guide, demonstrating the techniques for crafting a structured bucket hat, including the flat top, body, and crucial brim shaping.
Finishing Touches and Customization
Personalize your handmade creation.
Once you’ve completed all the rounds for your brim, it’s time for the final touches. Fasten off your yarn, leaving a tail long enough to weave in securely with your yarn needle. Weaving in ends neatly is essential for a polished look and to prevent your hat from unraveling. If you desire a stiffer brim, a more advanced technique involves inserting a thin wire or fishing line along the edge before the final round—however, for a beginner, the inherent structure of the cotton yarn and the every-other-round increase technique should provide sufficient stiffness.
This pattern is inherently adaptable. While designed for a standard adult size, you can easily adjust the number of increase rounds in the top section to create a smaller or larger crown for different head sizes, including children. Experiment with colors and yarn types to truly make it your own. Variegated yarns can add an interesting texture, while color blocking can create a bold, modern statement. The possibilities are endless, making each hat a unique reflection of your personal style.
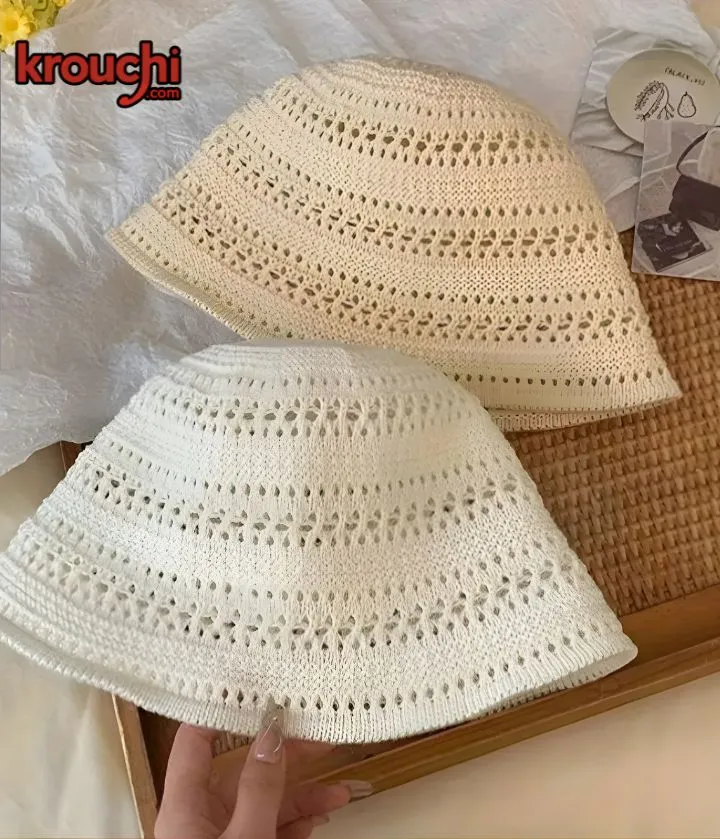
A completed crochet bucket hat showcasing its structured brim and classic silhouette, ready for wear.
Frequently Asked Questions
What kind of yarn is best for a structured bucket hat?
Worsted weight cotton yarn is highly recommended for this project. Cotton provides excellent stitch definition, holds its shape well, and is breathable, making it comfortable to wear. While acrylic can be used, it might result in a slightly less structured hat.
My hat’s brim is still wavy, even with the every-other-round increases. What am I doing wrong?
Waviness in the brim can sometimes occur due to inconsistent tension or if your yarn is slightly heavier than recommended for your hook size. Double-check your tension to ensure it’s firm but not overly tight. You might also consider going down half a hook size for the brim section to create a denser fabric that holds its shape better.
Can I use single crochet stitches for the entire hat instead of double crochet?
Yes, you can. Using single crochet (sc) will result in a denser, slightly stiffer hat. If you choose to use sc throughout, you will need more rounds to achieve the same height and diameter as with double crochet, and the stitch counts for increases will need to be adjusted accordingly to maintain a flat circle and straight brim.
How do I adjust the hat size for a child?
To adjust for a child’s size, simply stop increasing the crown section when it reaches the desired diameter for a child’s head (e.g., 7-8 inches for a toddler, 8-9 inches for an older child). Then proceed with the BLO transition, side rounds, and brim as instructed, adjusting the number of side rounds for desired depth.
What does “blocking” mean for a crochet hat?
Blocking is a finishing technique that involves wetting or steaming your finished crochet item and then shaping it to its desired dimensions while it dries. For this bucket hat, light steam blocking can help smooth out stitches, ensure the brim is perfectly flat, and enhance the overall shape. It’s often not strictly necessary for cotton yarn but can elevate the professional look.
Conclusion
The Quick & Easy Crochet Bucket Hat is more than just a pattern; it’s an accessible gateway into the rewarding world of crochet. By focusing on fundamental stitches and intelligent design choices—such as the strategic every-other-round increases for a straight brim and the impactful Back Loop Only technique for structural bends—this project ensures a professional, stylish outcome even for absolute beginners. It demystifies the creation of a chic accessory, providing clear, step-by-step guidance complemented by visual support. The result is a durable, fashionable hat that you can proudly say you made yourself, all while building a strong foundation of crochet skills. Pick up your hook, choose your favorite yarn, and embark on this delightful crafting journey; you’ll be amazed at what you can create one stitch at a time.
Recommended Further Exploration
- Explore advanced crochet hat shaping techniques for more intricate designs.
- Discover the best yarn types to achieve firmness and structure in your crochet work.
- Learn how to customize existing crochet patterns to fit various head sizes.
- Master basic blocking techniques to give your handmade items a professional finish.